• Privacy Policy
  • Thrift Store Finds
  • Fresh From The Farm
  • Craft Projects
    • Pinterest Party
    • Aprons
    • Quilting
    • Fabric
    • Sewing
    • Tutorials
    • Beads
    • Crafts
    • Jewelry
  • Shop & Support Me!
    • Shop Gluten Free on Amazon.com
    • Shop Omaha Steaks
    • Schwan’s Home Delivery on Amazon.com
    • Maryland Crabs
  • Book Shelf
    • Adult Fiction
    • Children’s Books
    • Cookbooks
    • Craft & Sewing
    • Gardening
    • Non Fiction
  • Skip to primary navigation
  • Skip to main content
  • Skip to primary sidebar

Good food, good company, good advice from Grandma

  • Home
  • Contact
    • About
      • About My Header
    • Hi, PR. What can I do for you?
    • Disclosure
    • Giveaway Rules: Please Read Them
    • Privacy Policy
    • Follow Me! Social Media Links
    • Recognition & Awards
    • FabGrandchildren
  • Gluten Free
  • The House
    • Getting Pre-Approved
    • Finding The One
    • The Loan Application
    • Closing The Loan
    • Fixing It Up
    • Thrift Store Finds
    • The Yard & Garden
  • Local
  • Travel
    • Campground Reviews
    • Hotel & Motel Reviews
    • Places I Want To Go
    • Alabama
    • Arizona
      • Colorado river
      • Grand Canyon
      • North Rim
    • Arkansas
    • California
    • Colorado
    • Florida
      • Amelia Island
      • Destin
    • Georgia
      • Atlanta
      • Helen
      • Marietta
      • Savannah
      • The Golden Isles
    • Louisana
    • Maryland
    • Mexico
    • Mississippi
      • Tunica
    • Missouri
    • Nevada
    • New Mexico
    • New York
    • North Carolina
    • Oklahoma
    • Pennsylvania
    • Tennessee
    • Texas
    • Utah
    • Virginia
      • Richmond
  • Health
    • Atherosclerosis
    • Chronic Pain
    • COPD
    • Fibromyalgia
    • Ostomy Life
    • PTSD
    • Rosacea
    • Skin Cancer
    • Sleep Apnea
    • Type II Diabetes
  • Recipes
    • Re-Create The Recipe
  • Gift Guides
    • 2016 Holiday Gift Guide
      • 2016 Holiday Gift Guide Sponsors
    • 2015 Holiday Gift Guide
      • 2015 Holiday Gift Guide Sponsors
    • 2014 Gift Guide
    • 2013 Holiday Table Gift Guide
      • Sponsors For Our 2013 Holiday Table Gift Guide
    • 2013 Family Gift Guide
      • 2013 Family Gift Guide Sponsors
    • 2012 Grandma’s Gift Guide
  • Fashion
  • Show Search
Hide Search

Tutorials

We Depend On Depend® To Keep Our Mother Comfortable

Karen · 8 Comments

This shop has been compensated by Collective Bias, Inc. and its advertiser. All opinions are mine alone. #CaringMadeEasy #CollectiveBias


mama at 88
My Mama

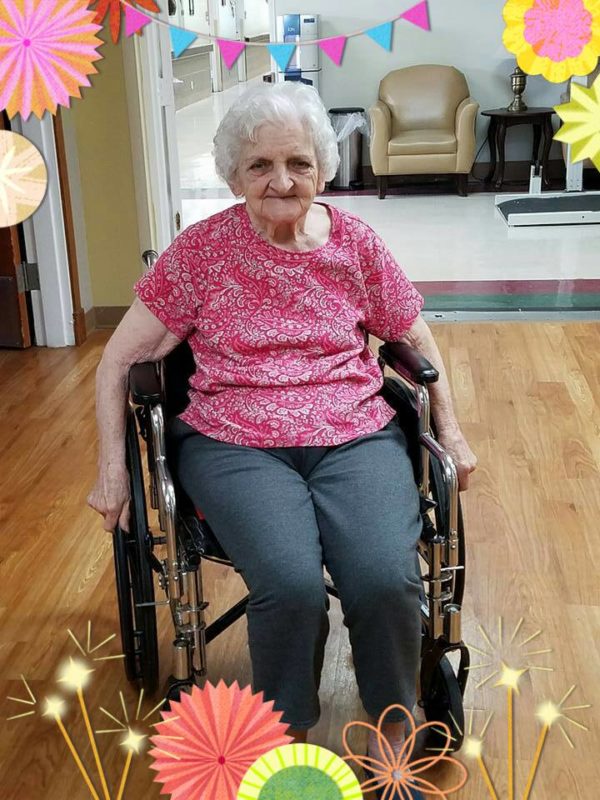
Our Mother is 88 years old. She has always been a very independent, strong, hardworking woman. She raised five children, and worked a full-time job for most of the years that we were growing up. So, when she started showing signs earlier this year that she was not able to do things she has always done, it was distressing to me and my siblings.  She also started doing some things that if it weren’t for the fact that they indicated her mind was slipping, it would have been funny. For instance, I took her to a doctor’s appointment in April, and she had to give a urine sample. I was in the bathroom with her, helping her with her clothing. To my surprise, she was wearing five pairs of panties, with a Poise® Liner in each pair! When I asked her why she had on so many pairs of underware, she told me that she couldn’t walk fast enough to get to the bathroom and she did not want to wet her pants. 

Mama was diagnosed with dementia not long after that, and we (my three siblings and I) had to make some very hard decisions. She was falling down at home because she forgot to use her walker. After the second fall, she was taken to the hospital via ambulance. Her doctor told us she could no longer live alone. So, we decided as a family to admit her to a rehab facility to see if they could improve her strength, while we looked for an assisted living facility to move her to. Last month, we got her moved in to a nice one bedroom apartment in an assisted living home just a couple of miles from my sister’s house. 

Now that Mama is in the assisted living facility, she is wearing Depend® Fit Flex Underwear for Women. These disposable undergarments are easy to get on and off, so that if Mama remembers to go to the bathroom, she can just pull them down like regular panties. And if she forgets to go, she won’t be embarrassed in front of the other residents of the facility. If she needs help changing, they are easy enough to get on and off that I am able to help her, even with my disability. Depend Fit-Flex women’s undergarments have all-around leg elastics and a smooth, close-to-body fit. When Mama has them on, no one knows she is wearing them.  They are soft, quiet, and breathable so that they are comfortable to wear. 

depend fit flex womens undergarments
Depend in the Sam’s Club Pharmacy.

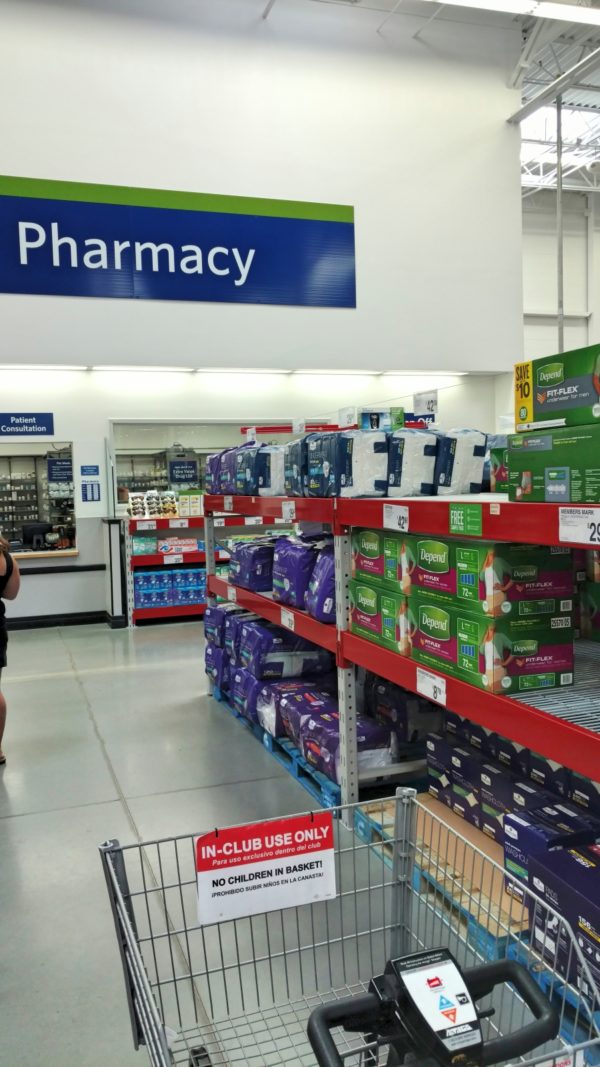
Depend® and Poise® products are both available at Sam’s Club, which makes it really easy for me to pick them up while I am shopping for other things. Sam’s Club is your one-stop shop for all things caregiving, including prescription refills, free health screenings, and health-related products. How do you care for your patients or loved ones and how can Sam’s Club help? Take a look at the Sam’s Club Caregiver page to see all the products and services available in the club.  You can also shop online, which is a great time saver. 

There is a sticker inside the Depend package that you can use to redeem at the Sam’s Club pharmacy for an awesome caregiver sample kit. I am going to get mine next time I go! And, if you download the Digimark app, you can scan anywhere on the Depend packaging, and it will take you to the Sam’s Club Caregiver website. How handy is that?

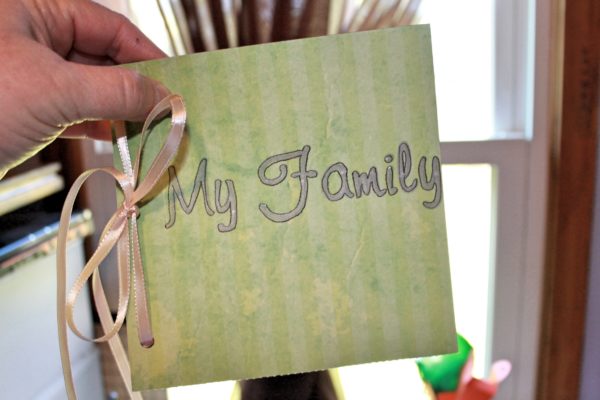
Mama has a hard time remembering family members. She usually thinks my sister is her mother, and she doesn’t remember my brother’s name. I decided to make her a Family Memory Book to tuck into a gift basket I am making for her. 

Family photos printed out.

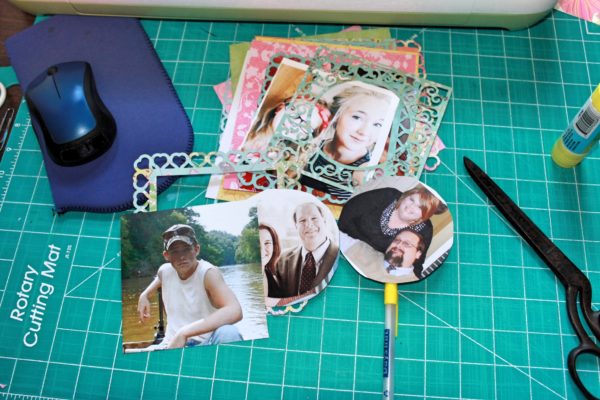
To make the memory book, I looked through family photos on Facebook, and downloaded a photo of each family member. 

My supplies
My supplies

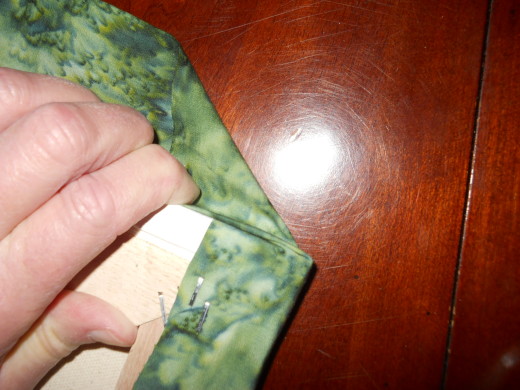
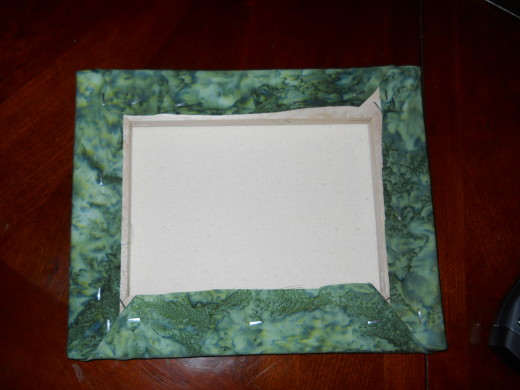
**Next, I chose some pretty paper, and cut out frames for each photo using my cutting machine. I varied the shape of the frames to make the book interesting. 

Cut the photos to fit the frames I cut out with my cutting machine.
I cut the photos to fit the frames I cut out with my cutting machine.

**Then, I pasted each photo onto a 6″ X 6″ sheet of colorful paper, and pasted a frame on each one. 

To help Mama remember, I used a marker to write everyone's name.
To help Mama remember, I used a marker to write everyone’s name.

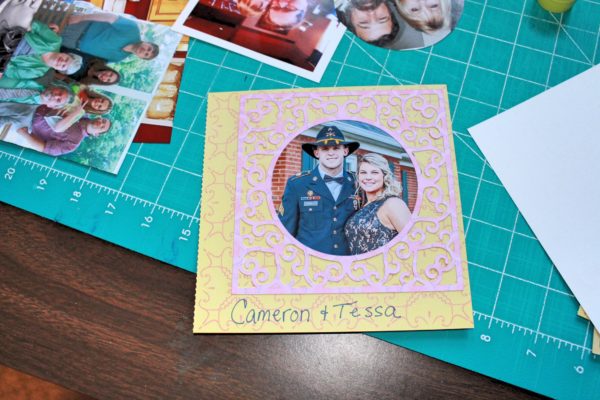
**The next step was to use a marker and write each person’s name on the paper, so Mama would know who they are. 

I used a hole puncher to punch holes in the paper.

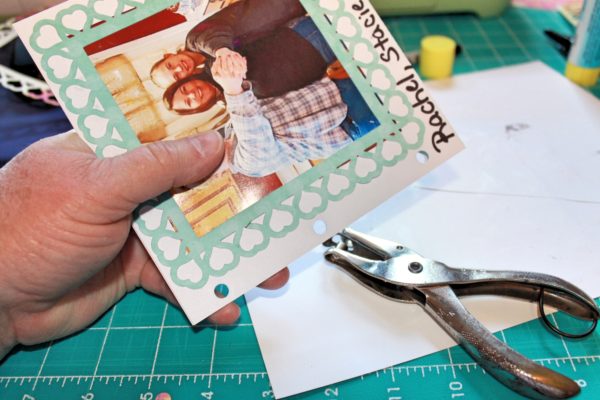
**Last, I punched holes in each sheet of paper, threaded a coordinating ribbon through the holes, and tied the ends of the ribbon in a bow. Now Mama has a small photo Family Memory Book to help her remember the names of her children and grandchildren. 
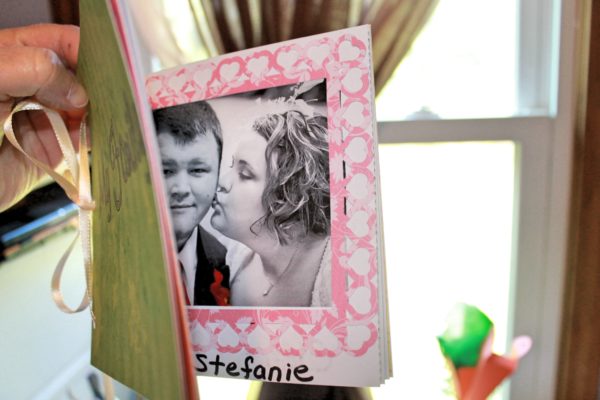
The finished Memory Book for my Mama.

The inside:

The inside of the memory book.

Do you have a friend or relative that needs a caregiver? Are you that person? What products or services help you the most? Do you have any tips or suggestions for helping someone with dementia remember those they love most?  What items would you include in a gift basket to help their transition into an assisted living facility go smoothly?

Share4
Tweet2
Pin1
Share
7 Shares

Filed Under: Medical Issues, Misc 2, Mother, Tutorials

Chocolate Easter Bunny Wreath Craft Tutorial

Karen · 5 Comments

I had fun creating an Easter craft for Chocolat Frey, and said I would show you how I did it. So, here is the tutorial on how to make the Chocolate Easter Bunny Wreath. 

Chocolate Easter Bunny Wreath

To make this Chocolate Easter Bunny Wreath, you will need the following supplies:

1 (12″) styrofoam wreath form

1 precut Jelly Roll Fabric pack, or 2 3/4 yards of fabric, cut in 2.5 inch strips width of fabric

5 chocolate Easter bunnies wrapped in aluminum foil, such as the Chocolat Frey Chocolate Bunnies

4 (3″) tiny plastic Easter baskets, or 4 baskets cut using Cricut Design Space

4 plastic Easter eggs

7 assorted color pipe cleaners

candy to fill the plastic eggs if you wish

2 yards satin ribbon for hanging

fabric jelly roll
fabric jelly roll
plastic eggs
plastic eggs
Cut the fabric strips in half
Tie the cut fabric strips around the wreath form.
Knot the strips loosely twice

As you tie the strips on the wreath form, push them tightly together. Keep tying strips on until the entire wreath form is covered. Next, add your embellishments.

 attach the bunnies to the wreath.
Use a pipe cleaner to attach the bunnies to the wreath.

I tried to pick pipe cleaners that matched the color of the bunnies, so that they would blend in. I twisted the pipe cleaner around the bunny’s “neck” (I know that sounds mean, right?), then run one end of the pipe cleaner under a couple of the fabric strips and twist again. Hide the ends behind the bunny. 

Card Stock Baskets cut with Cricut

 To attach the paper baskets to the wreath, carefully thread the pipe cleaner through the holes on one side. Run the other end of the pipe cleaner under a couple of fabric strips, and twist the ends together. Hide the ends behind the baskets. If you use plastic baskets, you will attach the same way, but don’t have to be as careful because they won’t tear as easily. 

Close up showing pipe cleaner threaded through paper basket.

Last, fill the plastic eggs with candy, and put them in the baskets.  Slip the ribbon through the wreath and bring ends together. Tie a knot in the end. All done. This is Chocolate Easter Bunny Wreath really easy to make, and requires no sewing. Do you think you would make one? 

Chocolate Easter Bunny Wreath

This post linked to the GRAND Social 

Share2
Tweet
Pin1
Share
3 Shares

Filed Under: Crafts, Projects, Tutorials

Sewing Basics: 12 Things You Need To Get Started

Karen · 41 Comments

One of my blogging friends, Linda at My 2 Crazy Curls, asked about what sewing supplies to get for someone new to sewing. In answer to her question, here is my list of 12 Basic Sewing Tools you need to get started sewing.

1. Sewing Machine

A Sewing Machine
A Sewing Machine

Of course, the very first thing you will need is a sewing machine. As someone who has been sewing for more than forty years, my advice to anyone who is just beginning to sew would be this: Get the best sewing machine you can afford. Generally, I don’t recommend buying a cheap machine from Wal-Mart. The reason for this is because it has been my experience that those machines are really only made for basic sewing tasks. Things like making repairs to ripped seams, hemming skirts and dress pants, and light crafts.

However, if you want to learn to sew to make garments for yourself and your family, you will need a better quality sewing machine. There is nothing, and I do mean NOTHING that is worse for someone new to sewing (or anyone for that matter) than to have to struggle and fight with your machine just to get it to do basic things.

My first sewing machine was a Kenmore from Sears, top of the line back in 1971. My father-in-law had bought it for his wife and she did not like it. For me, though, it was the perfect machine. It did everything I ever wanted in a sewing machine, including lots of fancy stitches and monograms. It was more machine than I needed when I first got it, but I used it until 2000, when I sold it to go traveling in an RV. The only reason I got rid of it is that it was not portable.

Make sure the machine is capable of sewing multiple layers of fabric, and that if you want to sew denim or hem jeans, you need a heavy duty machine. It needs to have at least a few basic and zig-zag stitches built in, as well as do buttonholes. If you are not sure what to buy, go to a store that sells sewing machines as a primary business. They can help you decide. Because, trust me, that cheap machine you get at Wal-Mart is NOT going to make you happy.

Now that I have given you my standard sewing machine lecture, here are 11 more things you will need to make you sewing hobby more pleasant:

2. Scissors

A good pair of scissors

Just like with the sewing machine, you are going to need a good pair of scissors. Buy the best ones you can fit into your budget. Then when you get them home, show them to every member of the family, and tell them that if they touch them they will be shot. I mean it. The scissors you buy for your sewing room will not ever be used for anything else. Do not cut plastic, paper, cardboard, rubber bands, hair, groom your dog, or trim flowers with them. They are for one purpose only: To cut fabric. Once you use those scissors to cut anything else, they will not cut fabric smoothly.

When my children still lived at home, I put a colorful ribbon on the sewing scissors, and hung them on the wall in my sewing room when I was not using them. I had several other pairs of scissors in the house, stored in the kitchen, living room, laundry room, and bathroom. Anyone could use any of those other scissors for any reason. But, they knew better than to touch my sewing scissors.

Any brand of scissors will be fine, as long as they are made for cutting fabric. I like Fiskars, and that is the brand I have used for many years.

3. A Cutting Board

A cutting board
A cutting board

You can get several kinds of cutting boards. I have used the cardboard kind that fold up for storage, and this plastic kind. I like the plastic kind better. Using a cutting board will save your dining room from being scratched up by scissors and pins if that is the only place you have for cutting your fabric. They also have rulers printed on them with straight and bias lines, which helps you line up your fabric for cutting.

4. Hand Sewing Needles

Hand sewing needles
Hand sewing needles

Yes, even if you are sewing with a sewing machine, you will need the hand sewing needles for things like sewing on buttons, sewing hems and tacking facings. If you get them and keep them in your sewing kit, you won’t have to be running to the store for them at the last minute.

5. Extra Sewing Machine Needles

Extra Sewing machine needles

I can not tell you how many times when I first started sewing I ran out of needles for my machine. When you are learning, you do things like sew over pins, sew too fast, sew too many layers at a time, sew with improper tension, sew with the machine improperly threaded, etc. that will cause needles to break. If you have two or three packages of sewing machine needleson hand, you won’t get frustrated by running out of needles at a crucial point at two in the morning.

6. Fabric Marking Pens or Pencils

Water Soluble Marking Pens

After cutting your fabric, you will need to mark dots, notches, and darts from the pattern onto the fabric. You will need some kind of marking pens that washes out with water for making the marks. This helps you match up seams and helps make your garments or crafts come out perfect.

7. Measuring Tape

Measuring tape
Measuring tape

I have several measuring tapes, and use them all the time when I am sewing. Whether I am making a quilt, a tote bag, a flower girl dress, or an apron, measuring twice before cutting, and then again before sewing, helps me keep the seams straight and even. Get at least one for your sewing kit. I also like to keep one in my purse.

8. Thread

Thread
Thread

If you are just starting out building your sewing kit, I would suggest getting two or three spools each of white, black, gray, and beige threads. Don’t buy the cheap stuff in the $1 bin. You will be sorry if you do. That stuff may be inexpensive, but it will break if you sew too fast, or if the tension on your machine is not just right. It will also pill up, and make little balls of lint next to your needle, so that sometimes it will even break your sewing machine needle.

There are many different manufacturers of thread, but most of the thread in my thread bin is Coats & Clark. I use either 37% cotton/67% polyester, or 100% polyester thread. It is smooth and doesn’t break as easily as 100% cotton. If in doubt about what to buy, ask the clerk in a fabric store what is the best thread to use for the project or type of fabric you are buying. You don’t want to mess up a fabulous project with the wrong thread.

9. A Magnetic Pin Dish and Pins Pins Pins

Pins Pins and more Pins

I like to use the pins that have the little plastic beads on the top. This makes them easier to find with your eyes when you drop them on the floor so that you don’t find them with your feet. Get lots of pins. More than you think you will ever use. Because you will use them. When I am showing someone new to sewing how to get started, I always tell them to PIN PIN PIN! The more pins you use when matching up seams and notches, the better, or straighter your seam will be. So, do yourself a favor and use those pins.

Also, go to Amazon and get a Magnetic Bowl – Tool / Nut / Bolt Holder. I have used mine since we started traveling in the RV in 2000. It holds pins magnetically so they don’t spill out everywhere. My pin bowl has traveled thousands of miles and never lost a pin. I have even used it in the cab of the truck to do hand sewing when we were traveling. Once you put those pins in that dish, they are NOT coming out until you pick them up. You are welcome.

10. Seam Ripper

Seam Ripper
Seam Ripper

The seam ripper will become your best friend if you take up sewing for a hobby. I have used mine more than I ever wanted to, more than I ever want to admit. The seam ripper comes in very very handy whenever you have made a mistake, and sewn the pants legs together at the bottom. Yes, I have done that on occasion. My seam ripper was also quite handy when I was making my niece’s flower girl dress. I thought I would never get that one thing sewn right. Besides taking out incorrectly sewn seams, a seam ripper will take off buttons you want to save, rip out zippers, and cut button holes open. Get one or two.

11. Extra Bobbins

Extra Bobbins
Extra Bobbins

Do yourself a great big favor, and buy a package or two of extra bobbins
for your machine.  Then make a habbit to wind two bobbins of thread before you start your project. The first thing I do when I sit down to sew is to make sure I have two (or more if it is a big project) bobbins of matching thread. It is sooooo frustrating to run out of bobbin thread when you are in the middle of a seam. If you haven’t wound that second bobbin, you have to take the project out of the machine, unthread the machine, rewind the bobbin, rethread the machine, then start over where you ran out of bobbin thread. Save yourself the headache with just the minute it takes to wind the second bobbin. No one ever told me that when I started sewing.

12. Iron and Ironing Board

Iron and Ironing Board

Even if you never iron another thing in your house, if you are going to sew, you will need an iron and an ironing board.  From start to finish, you will be using these to press the fabric, press seams open, press hems, and on and on. I like a steam iron, as it helps set seams and creases in fabric. I also like a heavier iron as it doesn’t take as much effort when the iron has some weight to it.  My ironing board is a small one that sits on top of my desk when I am using it. You can also lay a towel on a flat surface if you don’t have an ironing board. Don’t skip the pressing, get an iron.

I hope this list of basic sewing tools and equipment helps you some. Do you have any other sewing questions for me?

Share51
Tweet1
Pin407
Share2
461 Shares

Filed Under: Sewing, Tutorials

Fabric Art For My Sewing Room/Office:Pinterest In Practice

Karen · 4 Comments

156289049538176760_cIzRRH3T_c
Pinned from Hawthorne Threads Blog, but I couldn’t find the original post. Their url is http://www.hawthornethreadsblog.com/

While Fabgrandpa was painting the office for me today, I decided to work on a project that I saw on Pinterest. I saw it on the Hawthorne Threads Blog last year ,but when I tried to find the original post today it was gone. Good thing I pinned it! The idea is simple enough: you get some stretched canvas like a painter would use, and staple some pretty fabric on it. I loved the idea of it right away, because you know how I LOVE fabric.

Last week when we went to Rome for my gastro appointment, I saw a Michaels and asked Fabgrandpa to take me there after my appointment. We stopped there, and I got what I thought was a 2 pack of canvases. It turned out to be a grade 2, but with the packages that I bought, I wound up with 2 16″ X 20″ and 2 8″ X 10″ canvases, so it worked out to be enough.

Picking the fabrics to use was hard, because every piece I picked up, I thought of some other project I could use it for, but finally decided on four pieces to use.

For a 16″ X 20″ canvas, you need a 20″ X 24″ piece of fabric, and for an 8″ X 10″ one you’ll need a 12″ X 14″ piece of fabric. Iron the fabric to remove any wrinkles before you start.

Cut the fabric all around 2 inches larger than your canvas

Put the fabric face down on your work surface, then lay your canvas face down on the fabric. Fold the edges of the fabric over to the back of the canvas.

Fold the fabric to the back of the canvas

Us a staple gun to staple it in place.

Use a staple gun to staple the fabric to the canvas

Do the two longest sides first. When you do the two short sides, fold the fabric into a mitered corner.

Fold the fabric on the short edges into a mitered corner

Put one staple into the top edge of the canvas. Fold the fabric down onto the back of the canvas and staple some more.

Done!
Done!

Repeat on the other side, and you’re done. Be careful that you don’t staple your fingers. That staple gun if powerful! Also, I didn’t realize until I was finished that I got a blister on the inside of my thumb.

That is an ouchie!
That is an ouchie!

The finished product looks great hanging on the wall. I’ll show you the finished room tomorrow.

My Pinterest in Practice project looks pretty good.
Finished project
Finished project


Share11
Tweet
Pin25
Share
36 Shares

Filed Under: Crafts, Fabric, Tutorials

Crocheted Neck Warmer Tutorial

Karen · 4 Comments

I have had a little bit of time this week to work on something other than, gasp, sewing. Yes, I CAN do other things.  I decided to make a little “mini-scarf” or neck warmer. I used cotton crochet yarn because I don’t like wool up against my neck. This little scarf if just right to wear when you don’t need a big jacket:

my new mini scarf


It goes nicely with my favorite sweater


it's all single and double crochet, easy to do
crocheted mini scarf, crochet projects, neckwarmer
Braid the ends, and make a tassle and you're done.

It was a fun little project to do while I was sitting waiting for other things to happen, and I got a nice little wardrobe accessory to boot!

To make this:

Chain stitches to be the lengtht you want (measure around your neck). # of stitches must be divisible by 5+3 stiches. I used 73 stitches.

Rows 1-3 Single crochet three rows. 4th row, *Double crochet three, chain two, skip next two stiches*,  continue to end of row, ending with double crochet three. 5th thru 7th rows, single crochet.

Cut 18 strands of yarn, 18 inches long each. Attach 9 strands on each end of the crocheted piece. To do this fold each strand in half, and pull the loop through with crochet hook. Once you have all the strands attached, you’ll have 18 ends on each side. (2X9).  Using two strands for each part of the braid, braid the strands into three braids. Then braid the three braids together. Wrap a piece of yarn tightly around the ends, about3.5 inches from the unbraided end, and tie tightly. Unbraid to the wrapped piece of yarn, then trim tassle to 3 inches. You’re done.

Share4
Tweet
Pin4
Share
8 Shares

Filed Under: Crafts, Projects, Tutorials

6 Quick Sewing Projects That Make Great Gifts

Karen · 7 Comments

If you like to sew like I do, here are some quick to make sewing projects that make pretty nice gifts. Just click on the picture to take you to the project. If  you’ve got an hour, you’ve got time to make one of these!

Zippered Cosmetic Bag


one hour apron
One Hour Apron from Stop Staring and Start Sewing


One hour oven mitt pattern
Oven Mitt Pattern from Skip To My Lou


cotton candy kitty pattern
Soft Kitty Doll from Sew 4 Home


harry potter doll pattern
Harry Potter Doll Tutorial from My Paper Crane (MY daughter would LOVE this!)


onesie with tie tutorial
Cute onesie with a tie tutorial from Brassy Apple


Share5
Tweet
Pin835
Share
840 Shares

Filed Under: General, Tutorials

Tutorial: Make A Zippered Cosmetic Bag

Karen · 6 Comments

Even if you have never sewn in a zipper before, you will be able to make this cute little bag in about an hour and a half. To make it, you’ll need two fat quarters of fabric (18″ X 22″), two pieces of batting that measure at least 8″ X 10″,  one zipper at least 10″ long, scissors, thread, pins and a sewing machine.

You need two fabrics, some batting, and a zipper.

To get started, cut two pieces from each of the fat quarters that measure 8″ X 10″. Decide which one will be the outside of the bag. In this tutorial, the outside will be the puppy print fabric, and the inside will be the yellow prints.

cut two pieces of each fabric and two pieces of batting

Make a “sandwich” using one piece of each fabric and one piece of batting. Make sure the right sides of each fabric are facing out, with the batting in between the wrong sides of the fabric.

The sandwich, with the batting in the middle and fabrics right sides out.

Sew some lines of stitching through all three layers to quilt them. I usually sew from corner to corner in both directions, then do a couple more lines. It is up to you how much you want to stitch.

Make some lines of stitches to quilt the bag

When you are finished quilting both sides of the bag, set one sandwich aside for later.

This is what the quilted pieces will look like

Lay the remaining piece right side up, and place the zipper face down along the edge of the piece.

place the zipper face down, the fabric piece right side up.

Pin the zipper in place with a couple of pins. Then, starting at one end, stitch along the length of the zipper. Open the zipper part of the way to begin. After you stitch a few inches, close the zipper back up so that the zipper pull doesn’t get in the way of the needle and presser foot.

Start stitching with the zipper open

After stitching the length of the zipper, fold the zipper to the inside. Press with an iron.

Fold zipper to the inside

Go back to the sewing machine with the piece, and top stitch 1/4″ from the edge of the fabric.

Top stitch 1/4" from the edge of the fabric

This is what it will look like when  you have finished top stitching:

Top stitching keeps the zipper in place on the inside.

Next, repeat all the steps for sewing the zipper with the other piece of sandwiched fabric. When you have finished sewing in and topstitching the other side of the zipper, the bag will look like this:

The bag will look like this when you have finished the other side of the zipper

Next, fold the two pieces so that the outside pieces of fabric are together, on the inside. Match up the edges, and pin. Make sure the zipper is open half way before you start to stitch.

Fold so that the outside of the bag are facing each other

Stitch along the three sides of the bag, starting at the zipper edge and ending at the zipper edge on the other side. Be careful not to stitch over the hard pieces of the zipper. Stitch the beginning and ending few stitches back and forth a couple of times to reinforce the stitches so they won’t come apart.

Trim the zipper ends, and the corners at the bottom of the bag at an angle.

Stitch around the entire seam again with a zigzag stitch to prevent ravelling of the seams inside the bag.

Stitch along the seam again with a zigzag stitch

Turn the bag inside out, and press with an iron to set the stitches.

The inside of the bag

This little bag can be used for so many things! I use one for manicure supplies, one for jewelry, one for holding toothbrush, toothpaste and floss, etc.

What a cute little bag!

What is your bag going to hold?


Share8
Tweet
Pin42
Share
50 Shares

Filed Under: Sewing, Tutorials

How To Recover Cornice Boards In An Rv

Karen · 16 Comments

Way back on February 12, I said I was going to show you how to recover those cornice boards that are in RV’s everywhere.  I really did think I was going to do that project the next day, but…..one thing happened and then another, and I didn’t have the right screwdriver to get mine down off the wall with, so it took a very long time for tomorrow to get here.

The old cornice boards just don’t “go” with the new look.

Today I finally decided it was time to get that thing off the wall and finish my RV bedroom makeover. To start, I had to get the cornice board off the wall. It was held in place with two long phillips head screws. The shade was also attached to the cornice board, so I had to figure out how to get it off of the cornice without tearing it up. The shades also have the string mechanism attached to the wall down near the mattress.

This is the cornice off the wall, showing one of the screws holding the shade onto the cornice

I decided to take the cornice down by taking out the two screws. I then detached the two smaller screws that held the shade to the cornice. I left the shade laying on the bed in just the same position it was in when I removed it from the cornice, and left the strings attached to the wall. That way, I would know how it went back together.

recovering a cornice board on the tailgate of the truck

Once the cornice was off the wall, and the shade was off the cornice, I took the cornice outside to the tailgate of the truck. I knew it was going to be a messy job getting all the old fabric off, plus it was a very nice day outside.  The first thing I needed to do was figure out how to get the two pieces apart. I found out they were held together with staples, so I got a long flathead screwdriver and pushed in between the two pieces, slowly, so I could wiggle the staples out. Once the two pieces were apart, I had to take off the decorative “button” on the outside piece in the same way:

remove any decorative pieces carefully so they don’t break

After I had the pieces apart, I removed all the old fabric, and used it as a guide for how to cut the new fabric pieces. Once the new fabric was were cut, I stapled them onto the wood pieces. I don’t have a staple gun, so I used an ordinary office type stapler opened all the way out. It worked for the purpose, but I would suggest buying or borrowing a staple gun if you are going to do this project–it will certainly save your knuckles.

recovering the cornice boards in an rv
I used duct tape on part of this project

The first piece I covered was made of balsa wood, so the staples went in fairly easily. However, the second piece was laminated, and that made it very hard to staple with just that office stapler. So, I used 3M duct tape on the inside to hold the fabric in place. It isn’t going to show, and did the job very well.

When you have both pieces covered with the new fabric, you’ll need to fasten them back together. I just put the outside piece on top of the inner piece, and felt with my fingers to find the large staples that held them together. I placed a scrap piece of fabric over the area where the staple was, and hammered it down with a hammer. The last thing was to re-attach the decorative piece to the center of the cornice board. I also covered this wooden piece with some scrap fabric when I hammered it into place to prevent making any marks on it with the hammer.

tutorial how to cover cornice boards in an rv
I think this finishes off the room quite well!

It took me about two hours to complete this project. The hardest part was getting all the screws back in and getting the cornice back on the wall, mostly because my arms aren’t long enough. The shade went back on very easily, though.

Don’t you think this just completes my bedroom? It looks sooo much nicer to me.

recovering an rv cornice board
Re doing an RV bedroom is quite easy!


Share33
Tweet
Pin2K
Share
2K Shares

Filed Under: Crafts, Projects, Tutorials

  • Go to page 1
  • Go to page 2
  • Go to page 3
  • Go to Next Page »

Primary Sidebar

Food Advertising by logo

Become A Fab Follower: Sign Up To Follow Me By Email

Subscribe to my e-mail list

* indicates required

…

Amazon Gift Cards

Target
Food Advertising by logo

Fabgrandma Privacy Policy

Privacy Policy

My Most Popular Posts

Search Fabgrandma

Get Inexpensive Bi-focals! Mine were under $50!

Amazon Deals!

My Wish List--Buy Me Something, You Know You Want To!

Read All My Old Posts!

Chat Line Numbers - Find someone interesting to chat with.
AffordablePapers.com
- get your essay written for cheap.
logo
Food Advertisements by
95628c04d3dba09c1372b52bf5c280c0-332

© 2021 · FAB GRANDMA · ALL RIGHTS RESERVED

Find Your Influence
This website uses cookies to improve your experience. We'll assume you're ok with this, but you can opt-out if you wish.Accept Reject Read More
Privacy & Cookies Policy

Privacy Overview

This website uses cookies to improve your experience while you navigate through the website. Out of these, the cookies that are categorized as necessary are stored on your browser as they are essential for the working of basic functionalities of the website. We also use third-party cookies that help us analyze and understand how you use this website. These cookies will be stored in your browser only with your consent. You also have the option to opt-out of these cookies. But opting out of some of these cookies may affect your browsing experience.
Necessary
Always Enabled

Necessary cookies are absolutely essential for the website to function properly. This category only includes cookies that ensures basic functionalities and security features of the website. These cookies do not store any personal information.

Non-necessary

Any cookies that may not be particularly necessary for the website to function and is used specifically to collect user personal data via analytics, ads, other embedded contents are termed as non-necessary cookies. It is mandatory to procure user consent prior to running these cookies on your website.

SAVE & ACCEPT