
With March being National Craft Month, and the first day of Spring coming on March 21, it’s time to make some springy looking crafts to brighten up your dining room or kitchen. Jo-Ann Fabric and Crafts Stores provided me with gift card to purchase some crafting supplies just for that purpose! I was excited to be able to go shopping for pretty stuff to work with! Jo-Ann makes spring crafting easy during National Craft Month with a $5 off $25 or more purchase coupon and a spring crafting inspiration website
I don’t know about how it is in your house, but in mine, there is a bunch of stuff that stays on the dining table all the time: A napkin holder, salt & pepper shakers, a jar of honey, a bottle of syrup, and um, my little bottle of Beano. I also often sit at the dining table to make lists of things to do, a grocery shopping list, or whatever, and I need to keep a pen or two handy. So, I decided to make a cute basket to hold all that stuff. It would not only Spring up my dining table, but keep it more organized too. Here is a tutorial showing how I did it:

The Quilted Fabric Basket:
Materials needed:
2 fat quarters of fabric
a fat quarter of quilt batting (use scraps leftover from other projects)
1/2 yard of Peltex Stiff Interfacing
matching thread
Tools Needed:
Cutting board
Ruler
Scissors &/or Rotary Cutter
measuring tape
pins
Ironing Board & Iron
Step 1: Press fabric to get wrinkles out
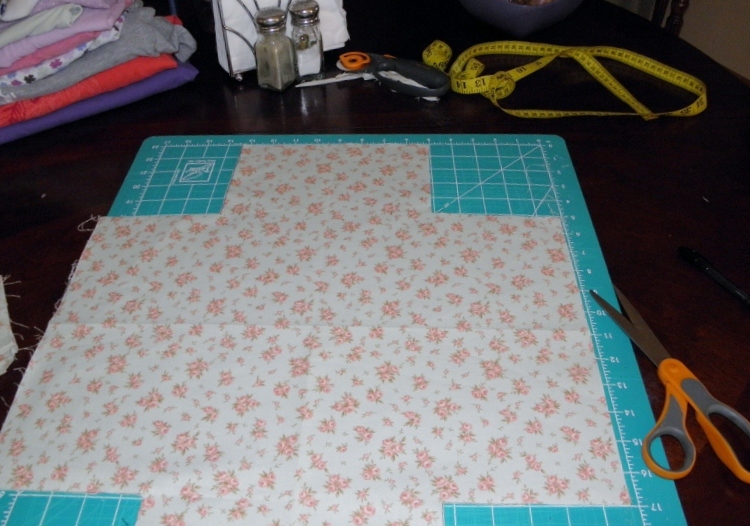
Step 2: Place the 2 fabric fat quarters on top of each other and trim off edges with ruler and rotary cutter.

Step 3: Measure at corners 5″ from each side to make a 5″square. Mark with a pen.

4. Cut out the squares you marked:
Step 5: Working with the outside fabric, lay it on top of the fleece batting right side up and pin.
Step 6: Cut out corners of batting using the fabric as a pattern. Leave pins in both layers.
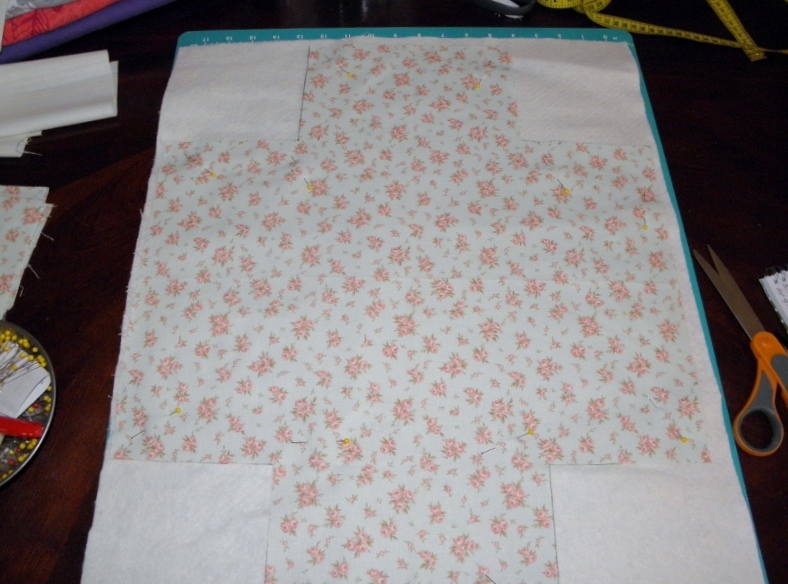
Step 7: Lay the fabric & batting on top of the Peltex, pin, and cut out the corner squares. You will now have a three layer sandwich that has the outside fabric face up, batting in the middle, and Peltex on the back.
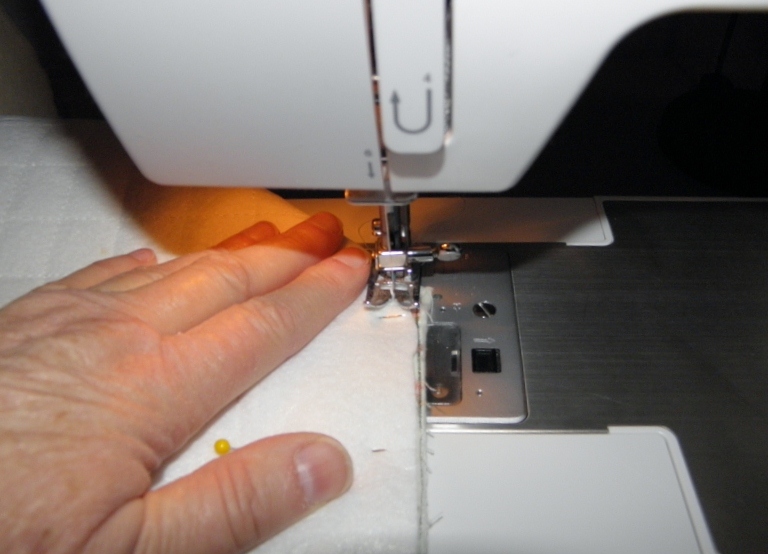
Step 8: With your sewing machine, quilt the sandwich all over in any pattern you like.

Step 9: Fold the sides where the squares were cut out to meet with right sides together. Stitch from bottom to top. Continue with all four sides of the basket.
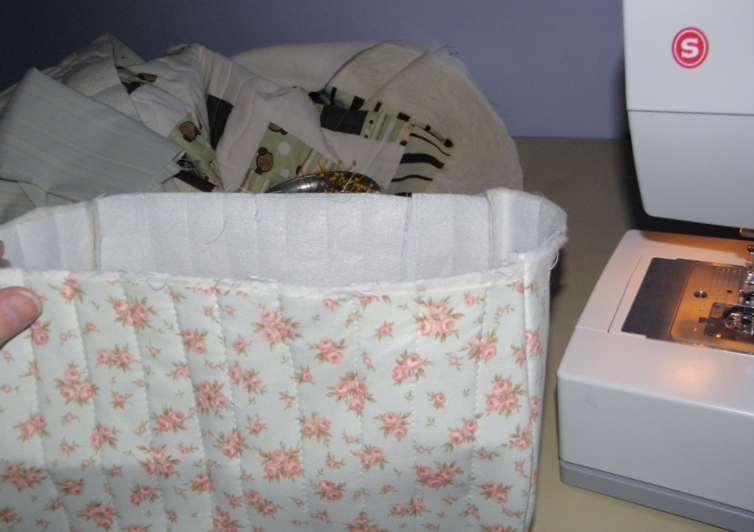
Step 10: The basket should look like this:
Step 11: Repeat sewing the corners on the lining fabric, with right sides together. When you have all four corners sewn, fit the lining over the outside of the basket, right sides together, and pin in place, matching all the corner seams.
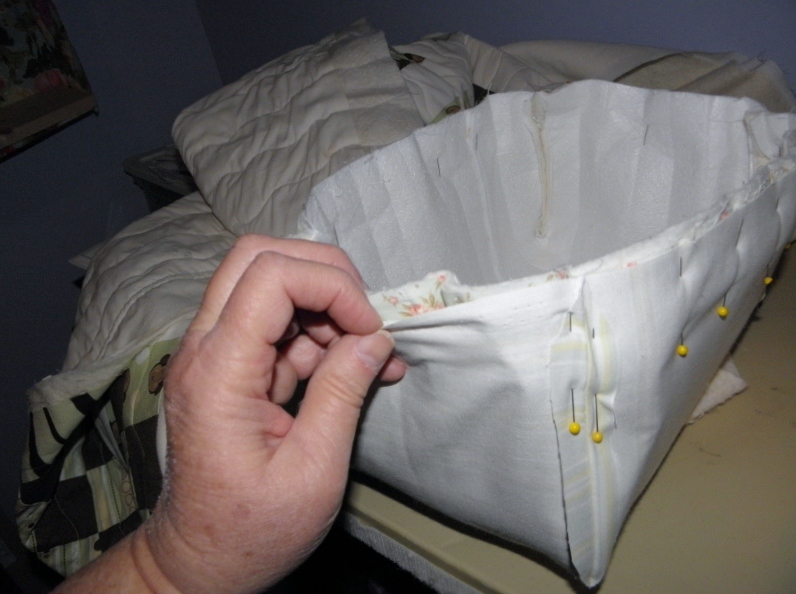
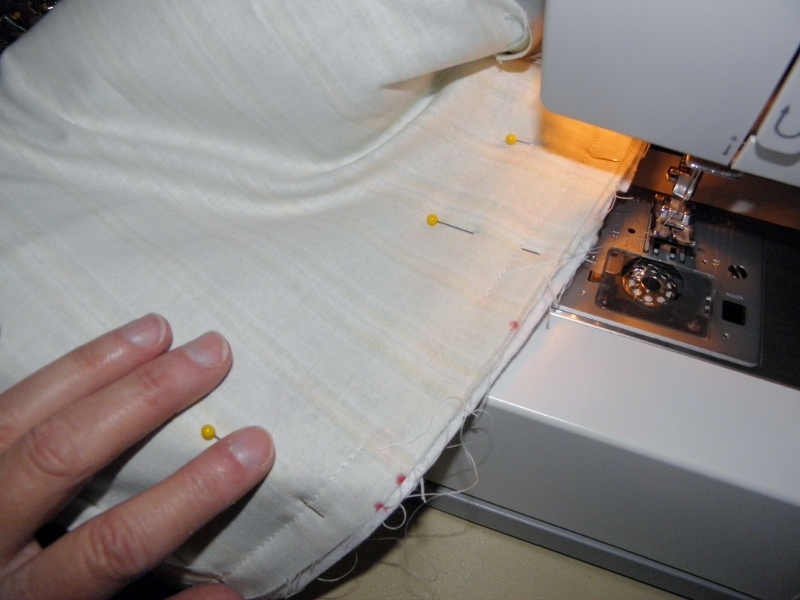
Step 12: Stitch using a 1/2 inch seam. Leave a 6″ opening so that you can turn the project inside out.
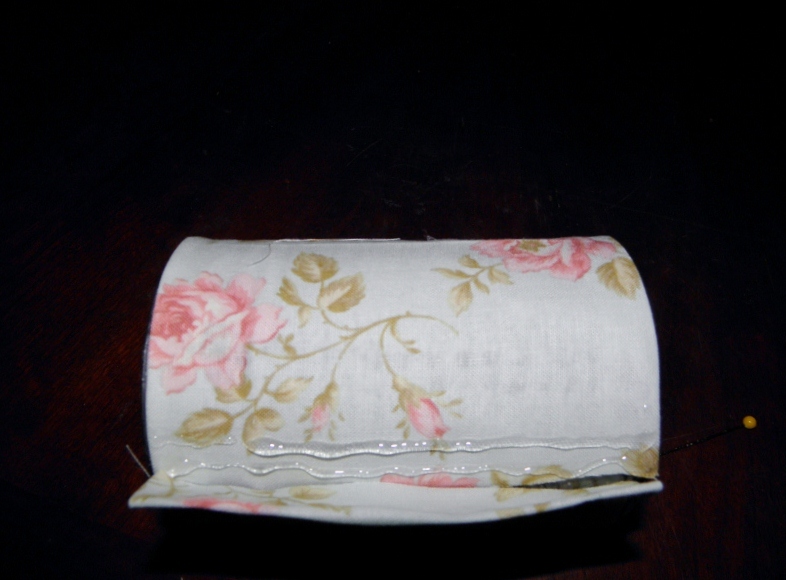
Step 13: Carefully pull the basket through the opening you left in the stitching, turning it inside out. Press seam towards the lining inside the basket. Pin the opening closed. Stitch close to the edge of the basket so that the lining and seam will stay down. (I forgot to take a picture of this step.) You are finished with this project, and this is what your basket will look like:
I wanted to have a matching container to hold pens and pencils, so I washed out a can from the beans I used for dinner the other night, and covered it with matching fabric. Here’s how I did that:
Pencil Can
Materials needed:
Scrap of fabric about 6″ X 15″
1 can
fabric glue

Tools Needed:
Scissor
Ironing board & iron
Step 1: Press the fabric to remove wrinkles. Lay the can on the fabric, and measure the width, adding 1″. Cut the entire length of the fabric to the width needed.
Step 2: Press under 1/2 inch on both sides of the fabric:

Step 3: Place a thin line of fabric glue under the fold, then press again to secure the glue.

Step 4: Lay the can on the fabric, and squeeze some fabric glue in two lines on the side of the can, and along both edges at top and bottom of can. Press the end of the fabric onto the glue strips and press down on it so it will stick to the can.

Step 5: Continue putting glue around the edges of the can, and pressing the fabric on it until you get to where you started.

Step 6: Trim off excess end of fabric. Fold edge over 1/2 inch, and glue it down.

Step 7: Put a double line of glue along the length of the can. Press the folded edge over the glue, and press down firmly so the glue will set and the fabric will stay where you put it.
Now you have a pretty, Spring-y look to your table top, and can be more organized too!


Such a cute idea! We have a few things that we are always shuffling around on our table and our china cabinet, this would make it a lot easier and keep it looking neater. I hate clutter!
My table seems to attract everything, it ends up being a storage place. This would at least help things look pretty!
Great idea, Karen. Thanks for sharing the tutorial, too.
I think you did a great job, Fab Grandma. I wish that I could sew. I’ve tried. My mother and sister can work magic with fabric, me – all I can do is make scraps.
Great tutorial, Karen. I need storage ideas that will help me clear out the clutter on my desk.
So crafty and cute! Perfect for Spring!
Super, super cute, and I love the fabric you chose – perfect for Spring! I sure wish I knew how to use a sewing machine!
Oh i love the basket!!! It’s sooo cute!! I wish I could sew… though I never tried so maybe I could!
That is a super cute idea! I love it. I can think of other fun uses for those little baskets. They would be perfect for a child’s (or teen’s) room or the bathroom to organize hand towels or beauty products. There are plenty of places around my home I could use something like this. Too bad I’m not crafty like you are.
The pencil can on the other hand – I can do that! I love that you repurposed the can too. This would make a great rainy day craft for kids too.
So cute Karen! I think I could use one in every room of my house! I wish I knew how to sew!
What a cute idea! I wish I had a sewing machine to play a bit
That basket is so cute. When can I expect mine to arrive. ? 🙂
How cute and crafty! I could use a couple of those baskets.
Great idea! Love that hey match and also keeps everything neat and organized.
Sadly, I don’t know how to sew, but that is really pretty! It’s also a wonderful way to stay organized.